The following procedure describes how to build an example workflow that moves applications to folders.
How it works
The image Example workflow shows a workflow that runs when an application completes a clearance check. If applications have passed the academic clearance check, the workflow moves the applications to the folder Ready for decision as shown below.
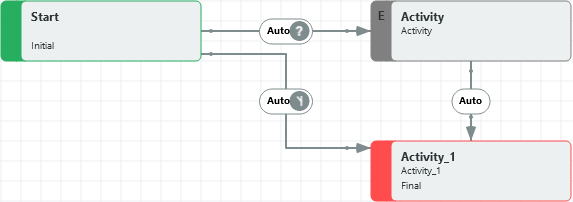
Build the workflow
Build the workflow as follows:
-
Create a new scheme: in Business Entities, on the Workflow Service Code of ADMISSIONS with the Business Entity Code of APPLICATION go to the business entity scheme menu button⋮ and then select
 View Schemesand then
 . Then, define the following:
- On Scheme details, in Custom event, select Application clearance check completed.
- Select
 , and Save and view scheme.
Scheme details 
-
On the workflow designer, check that the initial Start activity is present. To add an initial activity, select
 and then drag the activity to the required position.
Then, edit the activity: double-click the activity or select the activity and then
 and edit the activity as follows:
-
Enter Start in Name and State. Note that when you enter text in Name, the State changes to the same text.
-
Select Initial and For set state.
-
Do not Create any actions.
Initial activity 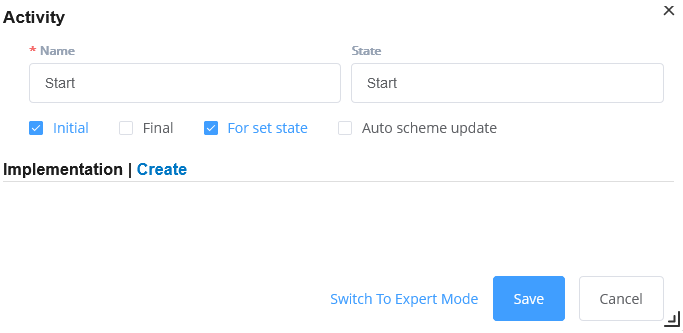
-
-
Add the activity that moves applications to the Ready for Decision folder: select the initial activity, then to add the transition and activity, select
 .
.Transition and activity 
-
Edit the transition as follows:
-
Set the Trigger to Auto.
-
Set the Condition to Conditional?
-
Set the condition Type to Action and, in Action, select HasClearedAcademicClearance so that if the application has passed academic clearance the activity moves the applications.
The image Conditional transition shows the transition is conditional and the defined condition.
Conditional transition 
-
-
Edit the activity to move applications to the Ready for Decision folder as follows:
-
In Name, enter Move to Ready for Decision. Note that the State automatically becomes the same as the name.
-
Select Create and then, in Action, select MoveToFolder.
-
Set the Action parameter: select the button
 and set the Folder code to Ready for Decision.
Settings for the activity to move to ready for decision 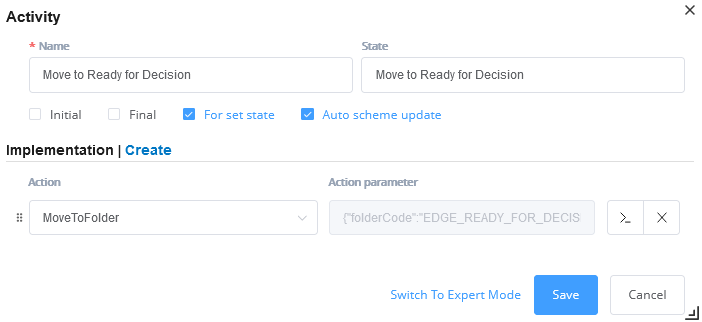
-
-
Add the final activity that ends the workflow process: in Name, enter End and then select Final as shown in the image Settings for the final activity.
Settings for the final activity 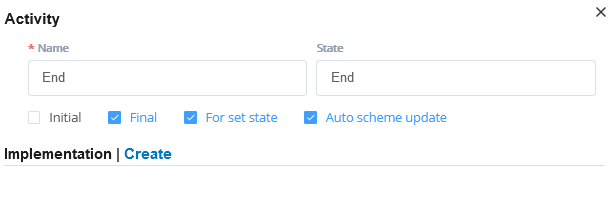
-
Add a transition Otherwise from the initial activity to the final activity: to add a transition, select the initial activity
 and drag the transition arrow to the final transition. Then, edit the transition as follows:
-
Set the Trigger to Auto.
-
Set the Condition to Otherwise
Transition otherwise 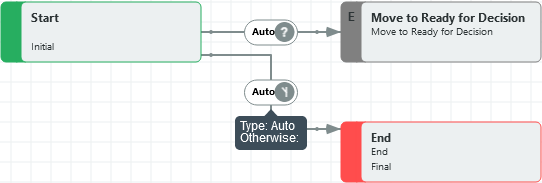
-
-
Add a transition from the move to folder transition to the final activity: to add a transition, select the initial activity
 and drag the transition arrow to the final transition. Then, edit the transition as follows:
-
Set the Trigger to Auto.
-
Set the Condition to Always
Final transition 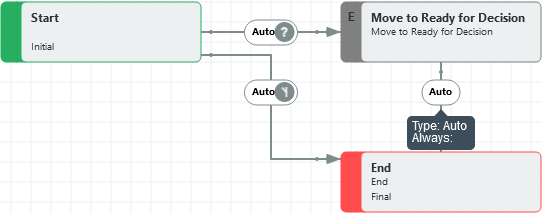
-