Roles define the permissions of users in groups. Groups are assigned to roles in authorisation areas. Groups are assigned to roles in the Web apps area to use apps, such as Applications, and to roles for features, such as the Applications supervisor role.
Add and assign a group to roles as follows:
-
Log in to Tribal Platform using an account with permissions to manage authorisations, such as an account in the EdgeAdministrator group.
-
Add the group in Tribal Platform. On System admin, go to Authorisation and then Groups and select
 and enter the Group name, such as 1_ApplicatinosManagers, and a Description.The Group name must exactly match the group name defined in the student management system or Microsoft Entra ID.
 -
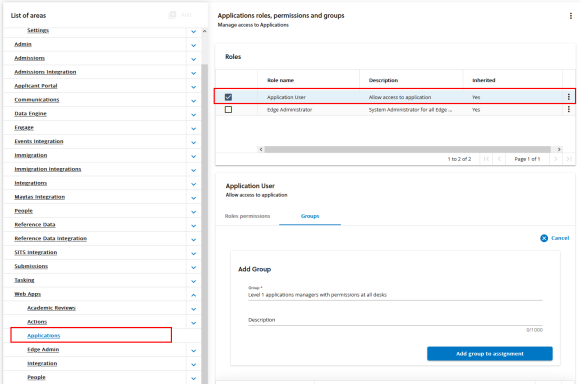
Assign the group to the required web app as follows:
-
Go to Authorisation and then Permissions and then Web apps . Then, select the role Use application for the required application, such as Applications.
-
On the Groups tab, select and enter group name in Group and add a Description, such as Applications managers require to use the Applications app. Then, select .
-
-
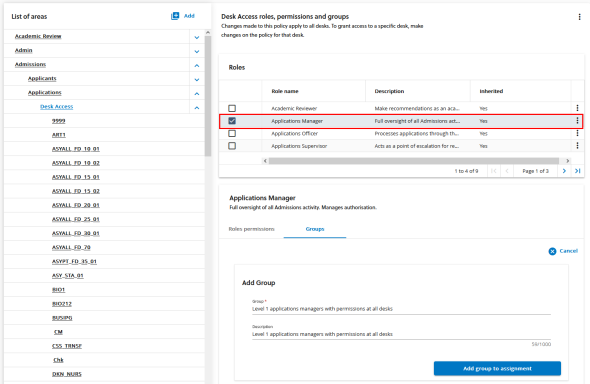
Assign the group to a role in the required authorisation area as follows:
-
Go to Authorisation > Permissions . Then, select the area for the feature, such as the People, and select the required role such as People manager. Optionally, you can adjust the permissions. However, you cannot select or clear permissions that are inherited.
-
On the Groups tab, select and enter the group name in Group and add a Description such as Applications managers with permissions on person profile. Then, select .
-
-
Check the group assignments. On Authorisation > Groups, go to the group, such as the group 1_ApplicationsManagers and then select
 . Check that the group is assigned to the Applications manager role and to the web app applications.
The video Assign groups to roles shows how to assign a group to roles and then how to check the group's assignments.

